How to make a plyo box
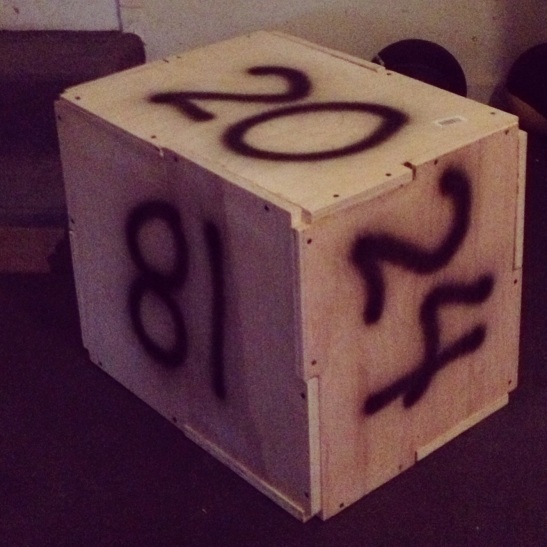
For those of you who know me, you know that my wife is a personal trainer, and I recently got into Crossfit. So, I decided to turn half of our garage into a gym. We had a bunch of equipment already and we bought some other stuff that we didn’t already have. The gym came together pretty nicely (I’m writing another post about that coming soon), and one of the last things that we needed was a plyo box. Given that my wife might be training different types of clients, I really wanted one of those boxes that you could flip to create three different jumping heights. In our case, 18 inches, 20 inches and 24 inches.
I looked them up online and they’re pretty expensive – to the tune of $200 or more. I’m a pretty handy guy, and this is just the kind of project I like – doesn’t need to be pretty; just needs to be effective. So, I set out to build one on my own.
I made a couple of decisions based on information that I found online. First, I used ¾ inch birch plywood. In retrospect, I probably didn’t need wood that hefty – it’s pretty darn solid. I’m guessing that normal builder grade plywood would do fine. Second, I didn’t want to take the risk of jumping on a side only to have it collapse inward, so I wanted every side to sit ‘on top’ of the vertical pieces holding it up. With a normal cube, of course, this is impossible. So, I decided to use a puzzle piece design. Here’s what that looks like:
The idea is that when you jump on the box, the tabs on all four sides are putting downward pressure on the sides rather than having one or more sides relying solely on the screws and glue and risking having the side cave in when you jump on it.
To do this, I started by cutting 6 basic pieces of the following dimensions:
18×20 (2)
20×24 (2)
18×24 (2)
So, I end up with rectangles that look something like this:
I then marked off the halfway point on each side. DO THIS FIRST! Once you start making cuts, the halfway point changes, which will cause your sizes to be off (trust me, I learned this lesson the hard way!)
Then I measured a straight line from each of the midpoints to the end at a depth of 3/4 inch (or whatever the width of your plywood is). So, now you have a piece that has these pieces left to cut out:
I made my cuts with a circular saw, but a table saw would have been a bit more precise. Regardless, it came out pretty good. Here is what the piece looks like when it is all cut out:
And here’s what the cube looks like. As you can see, the puzzle design makes it so that all 6 sides have tabs that put downward pressure and make it impossible for the plyo box to cave in. I used wood glue and then put two screws into each tab (I used 1 inch drywall screws. Because of the design, I wasn’t worried about using heavier duty screws).
If you don’t want to go through the hassle of making all the cuts, let me know! I’ll make the cuts and send you the pieces to assemble. Contact me here


I gotta say, this was a very cool post. Nicely done!
Thanks! The box came out a lot better than I was expecting. Imagine my surprise when I put all of the pieces together and they actually fit!
Pingback: Making our garage into a gym | Tim's Finds
Cool design – thanks!
Just curious whether you’ve ever thought the box could use any internal bracing over the longer spans. I’m planning to make a 20x24x30 box, and I’m thinking I’ll at least place one 2×4 in the middle of the 30″ span. I might add another for the 24″ span to be safe.
I’ve been using mine now for 7 months and it is extremely sturdy. The puzzle piece design works exactly as I hoped it would. Certainly it can’t hurt to add an internal brace, but it definitely hasn’t needed it for me. I don’t have a 30″ side, but as long as the plywood is thick enough, you should be fine even at 30 inches.
Hey mate I’ve just finishing making my box it works a treat. I made it 24, 28 and 32 inches. Thanks for the design
32 inches is no joke! Thanks for sharing. If you’ve got a picture I’d love to see it. My box is now nearly a year old and still works great. No loss of stability at all.
Great design,!
I been shopping online to get my hands in one of those ply boxes, Pricy for me
this idea will do very well for me, plus I love to build wood Stuff. ll tell you in a few days the results..!
Hi I used your diagram to make a plyo box! Came out awesome thanks
Great to hear. Mine is still going strong 18 months later!